Quantcast
Channel: ServerMom
Viewing all 159 articles
Browse latest View live

How to Build OpenVPN Server On Ubuntu

$
0
0

I will show you a step-by-step guide how to install and setup OpenVPN server on Ubuntu 14.04 VPS with screenshot pics as always. I believe you’ll easily understand and be able to implement it all by yourself even you are a really newbie.

As a refresh, what is VPN and OpenVPN? VPN stands for Virtual Private Network while OpenVPN is an open-source software application that implements VPN techniques for creating secure point-to-point or site-to-site connections in routed or bridged configurations and remote access facilities. Shortly saying, it is a free mechanism and tool to allow you to browse securely and privately plus it allows you to unblock browsing restriction, avoid website censorship, and to hide your real IP (location). I posted detailed explanation about it on my previous posts which you may also want to read it:

  1. How to Install OpenVPN on CentOS
  2. How to Install OpenVPN AS on Ubuntu
  3. Easiest Automatic Way to Install OpenVPN on Ubuntu

What You Need

  1. A server / VPS running Ubuntu. In this guide I use Ubuntu 14.04 x64 with 1GB RAM from Digital Ocean (DO). As always I use DO for testing purpose as I can simply create and destroy a server without having to pay for a full month. Feel free to use VPS from any provider you want like Ramnode, Crissic, and else.
  2. You may also need a proper knowledge to use Putty, SSH and common Unix command.
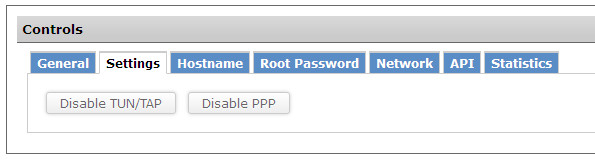
  3. And if somehow you are using an OpenVZ-based VPS, you have enable TUN/TAP options in your VPS control panel (e.g: SolusVM). Xen and KVM users do not need to.

Enable TUN/TAP:

How to Install OpenVPS Server

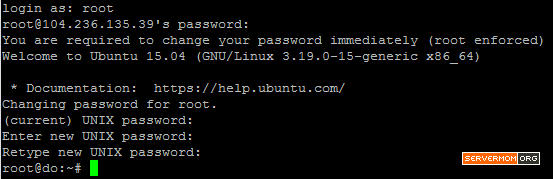
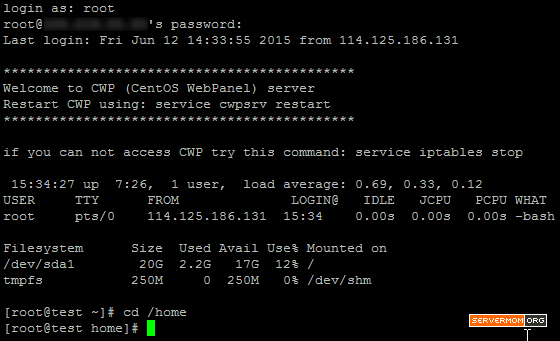
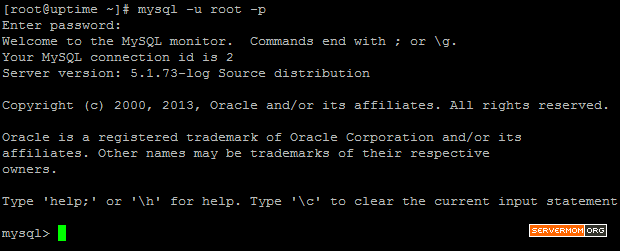
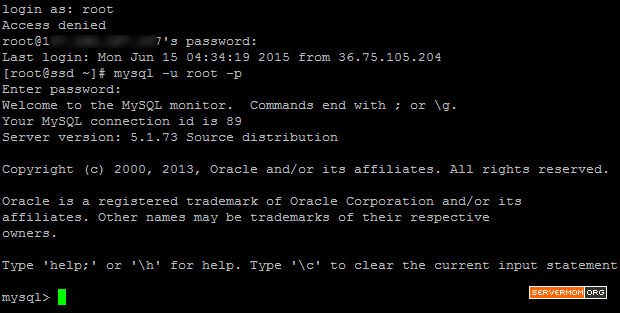
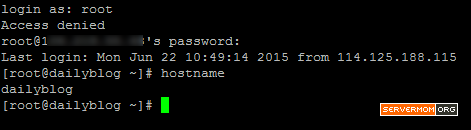
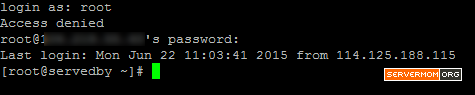
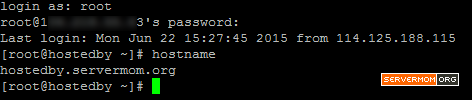
Step 1 – Login to your server as root:

loginasrootubuntu

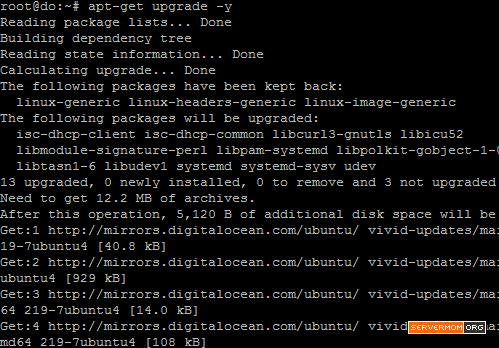
Step 2 – To make sure your Ubuntu’s repository is updated, simply do the apt-get update command:

apt-get update

aptget-update

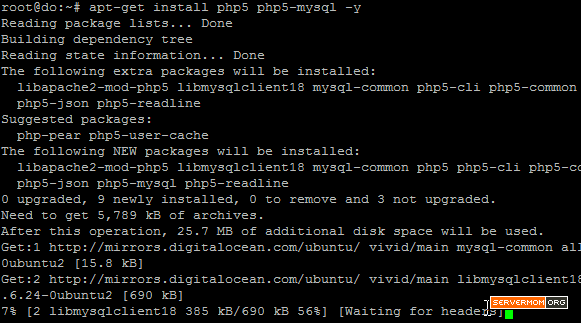
Step 3 – And once you get the “Done” message, you can now install OpenVPN and Easy-RSA with this one line command:

apt-get install openvpn easy-rsa

Do not forget to answer with Y when asked:

install-openvpn-ubuntu

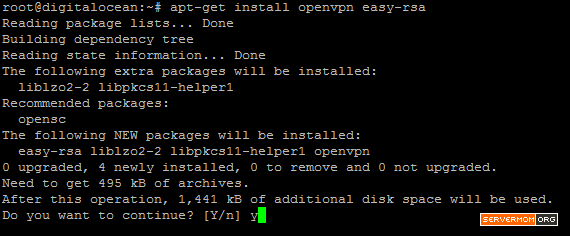
Once done, you’ll see something like this:

openvpn-installed

Step 4 – Now you have to get the configuration file for OpenVPN to work. Issue this command:

gunzip -c /usr/share/doc/openvpn/examples/sample-config-files/server.conf.gz > /etc/openvpn/server.conf

This will give no output when it is done.

server-conf

Step 5 – Then open that file using your favorite text editor which I prefer to use Nano, just type the command then hit Enter and the text editor will show up :

nano /etc/openvpn/server.conf

Configuring OpenVPN Server

Step 6 – Next, there are several lines in that file you need to edit (configuring OpenVPN):

6.1 – Look for the section called Diffie hellman parameters:

diffie-hellman-parameters

then change dh dh1024.pem to dh dh2048.pem to increase the security encryption.

6.2 – Next, find this section as well:

openvpn-config1

This section tells VPN server to pass on clients’ web traffic to its destination. Simply uncomment that part so it looks like this:

openvpn-config2

6.3 – Now let’s move to the next section just right after the previous one, just move down a bit.

openvpn-config3

again, uncomment the two lines of configuration so it looks like this:

openvpn-config4

That section tells OpenVPN to configure DNS Resolver using OpenDNS, you can change that to Google DNS as well (8.8.8.8 and 8.8.4.4).

6.4 – The last one, look for this section:

openvpn-config5

Uncomment that section:

openvpn-config6

That’s it. Now save changes and exit. If you are using Nano editor like me, simply hit Control+O then Control+X.

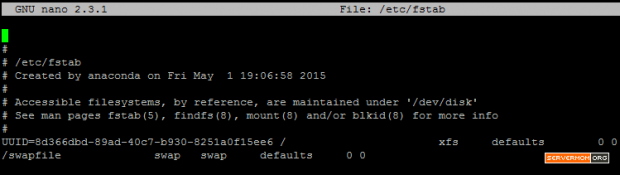
Step 7 – You will also need to enable IP forwarding in the file /etc/sysctl.conf need to tell the server’s kernel to forward traffic from client devices out to the Internet. Issue this command:

echo 1 > /proc/sys/net/ipv4/ip_forward

it will output nothing

port-forward

next you can edit the sysctl.conf file using Nano or your favorite editor.

nano /etc/sysctl.conf

Now Uncomment the line to enable packet forwarding for IPv4:

ipv4-forward

make it like this:

ipv4-forward2

Now save changes and exit (Control+O then Control+X in Nano)

Step 8 – Next, issue this two lines of command to tell UFW to allow UDP traffic over port 1194:

allow ssh
allow UDP traffic over port 1194

pic:

ufw-allow-udp

* UFW = Uncomplicated Firewall, a firewall app comes by default in Ubuntu 14.04

Step 9 – Change UFW’s primary configuration file by setting its forwarding policy using Nano:

nano /etc/default/ufw

In that file, look for this line: DEFAULT_FORWARD_POLICY=”DROP”

and replace DROP with ACCEPT

forward-policy

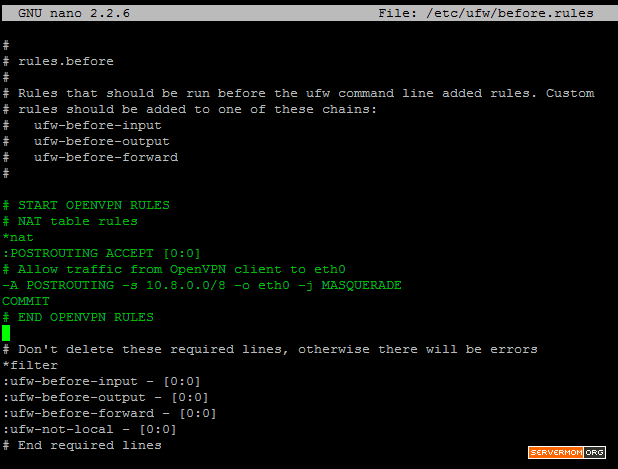
Step 10 – Also, you have to add additional UFW rules for network address translation and IP masquerading of connected clients. Issue command below:

nano /etc/ufw/before.rules

Then add additional section right after rules.before (near the top). Copy paste this setting:

# START OPENVPN RULES
# NAT table rules
*nat
:POSTROUTING ACCEPT [0:0] 
# Allow traffic from OpenVPN client to eth0
-A POSTROUTING -s 10.8.0.0/8 -o eth0 -j MASQUERADE
COMMIT
# END OPENVPN RULES

so it looks like this:

ufw-before-rules

Save changes and close the editor (Control+O then Control+X in Nano). Done? Simply enable UFW:

ufw enable

answer Y when asked.

ufw-enable

Build the Certificate Authority for OpenVPN

Step 11 – You have to copy over the Easy-RSA generation scripts to OpenVPN directory and create a directory called easy-rsa/keys:

cp -r /usr/share/easy-rsa/ /etc/openvpn
mkdir /etc/openvpn/easy-rsa/keys

easy-rsa-setup

Step 12 – Now you have to edit few variables using your favorite editor:

nano /etc/openvpn/easy-rsa/vars

Scroll down the page a bit and look for default values for fields which will be placed in the certificate, change that according your preferences:

key-cert

Step 19 – Also look for this line:

export KEY_NAME="EasyRSA"

and change that “EasyRSA” part with “server” for simplicity.

key-name-server

Now save changes and exit the editor.

Step 20 – Next, generate the Diffie-Hellman parameters using this command:

openssl dhparam -out /etc/openvpn/dh2048.pem 2048

just wait as it may take few minutes to complete:

diffie-hellman-generate

Step 21 – Now move to easy-rsa directory and initialize the PKI (Public Key Infrastructure). Issue these ones:

cd /etc/openvpn/easy-rsa
. ./vars
./clean-all

The last clean-all command is to clear the working directory of any possible old or example keys hence you can create our new one.

clean-easy-rsa

Step 22 – Let’s build the Certificate Authority (CA) using this simple one line command:

./build-ca

You’ll be asked a series of question but simply hit Enter for each. Don’t worry it is already set to your entries earlier:

openvpn-ca

Step 23 – Next, build the server’s key with this command:

./build-key-server server

You can replace server with whatever you’ve defined in step 19 above. E.g: if the export KEY_NAME is servermom then it looks like this

./build-key-server servermom

You’ll be again asked with series of question, simply hit Enter until you see a message saying Database Updated.

build-server-ca

Step 24 – Now the Server Certificates and Keys are created, you then have to move them in the OpenVPN directory:

cp /etc/openvpn/easy-rsa/keys/{server.crt,server.key,ca.crt} /etc/openvpn
ls /etc/openvpn

you should now see the three files have been moved

copy-server-cert

Step 25 – That’s it. Now you can start OpenVPN using this simple command:

service openvpn start

Then next time you can make sure it is running by issuing this command:

service openvpn status


start-ovpn-server

Using Your OpenVPN Server

Step 26 – Before you can use your newly built OpenVPN server, you have to firstly create certificates and keys for each client device which will be connecting to the VPN. Still in the /etc/openvpn/easy-rsa directory, build authentication credentials for a client which in this example we call it client1. Issue this command:

./build-key client1

You can simply press Enter for each question or you may also change its default value but make sure the two last questions are left blank (hit Enter). But do not forget to answer Y for the very last questions.

build-ca-client1

Step 27 – Now copy the example client configuration file to the Easy-RSA key directory and rename it as client.conf.

cp /usr/share/doc/openvpn/examples/sample-config-files/client.conf /etc/openvpn/easy-rsa/keys/client.ovpn

copy-client-conf

Step 28 – Now download the client1.crt, client1.key, client.ovpn and ca.crt files to your device (PC, Smartphone or Tablet). Remember that ca.crt file is stored in /etc/openvpn/ directory at your server while the other three are in /etc/openvpn/easy-rsa/keys/.

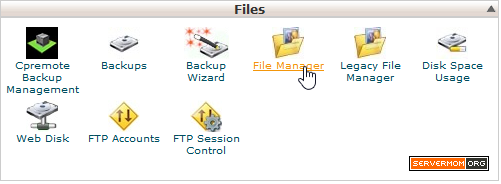
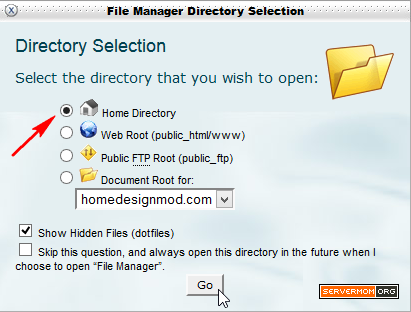
How can you download those files using Filezilla or WinSCP.

filezilla-transfer

Step 29 – Once downloaded, open up client.ovpn file using simple text editor like Notepad (In Windows, right-click then Open With..). Look for this line: remote my-server-1 1194. Replace my-server-1 with your server/vps IP address:

edit-client-ovpn

In this example I use Sublime instead Notepad.

edit-client-ovpn-2

Next, this is optional but may needed if you want to use it on your non-Windows device (iOS or Android or Linux), uncomment the user and group section:

edit-client-ovpn-3

That’s it. Save changes and exit the editor (Notepad, Sublime, etc).

OPTIONAL STEP

Basically your client.ovpn configuration file is ready to use now but you have to copy all four files to your OpenVPN Client’s config folder. However you can join / unified all those four files into one single client. ovpn file. To do that, re-open the client.ovpn file using Notepad. Scroll down to the very end of the page and paste below entries:

<ca>
(insert ca.crt here)
</ca>
<cert>
(insert client1.crt here)
</cert>
<key>
(insert client1.key here)
</key>

Next, open the ca.crt file in Notepad, copy and paste all what inside it to client.ovpn file.  Do the same for client1.crt and client1.key. Once done, save changes and exit text editor. You see the example of my unified result here. Save changes and exit text editor

Step 30 – Now copy the configuration file to default OpenVPN config folder (client app). In Windows it should be at C:\Program Files\OpenVPN\config.

client-ovpn-copied

Big note: You have to copy all the four files if you have not joined them in single .ovpn file.

That’s it. Now you can open OpenVPN client app and try your newly created VPN for the very first time

connection-vpn

Huff.. that’s really a long long steps but it will give you totally different satisfaction to build it yourself. However, if you want to cut all those steps and want easier method to install OpenVPN server then simply read and follow my previous guide about OpenVPN auto-installation on Ubuntu server here. Do not forget to follow me on Twitter to get notified for new posts. Thanks

This post How to Build OpenVPN Server On Ubuntu is part of ServerMom.


How to Install OwnCloud on Ubuntu 15.04 VPS

$
0
0

OwnCloud is really a cool app, it is shortly a Dropbox-like app allows you to have your very own cloud storage to backup and sync your data across many devices including Desktop PC, laptop, iOS and of course Android devices. The best part of using OwnCloud is that you build it yourself and the storage limit is only limited by the VPS plan you bought.

OwnCloud is basically very easy to get it installed on your VPS and even on a Shared hosting. If you are really one of DigitalOcean’s fans out there, you can simply look at the Applications tab and build a ready -to-use OwnCloud droplet but however the version in that image is not always updated regularly.

owncloud-image

In this tutorial I will guide you to install OwnCloud 8 on Ubuntu 15.04 Vivid Vervet VPS on Apache, MariaDB and PHP5 stack, each steps with screenshot pic as always.

What You Need

You’ll need few stuff below:

  1. A VPS running Ubuntu 15.04. In this article I use a droplet from DigitalOcean (DO) with 512MB of RAM and 20GB SSD storage. DO is my first choice because I can build a server, test cool things and destroy. However that doesn’t mean I don’t have a production server running at DO, I have one and it is pretty solid and stable. Also, the distro I use is Ubuntu 15.04 x86_64.
    *p.s: Never use DO before? Signup DigitalOcean via this special link to get free $10 credit in your account.
  2. You may also need a proper knowledge to use Putty, SSH and common Unix command.
  3. A spare time to follow this guide.
  4. A cup of tea or coffee.

Build OwnCloud Server Manually

Step 1 – Get a fresh Ubuntu 15.04 server, minimal version is recommended. Now login to your server as root (I assume you knew how to use SSH / Putty). If you are using a droplet from DO like me, you will be asked to change default root password:

login-ubuntu-vps-do

Step 2 – Make sure all packages are up to date using command below:

apt-get update -y
apt-get upgrade -y

pics:

apt-get-update-ubuntu-1504

apt-get-upgrade-ubuntu-1504

Step 3 – OwnCloud is a web-based app that require a web server to run so go ahead to install Apache, don’t worry it is easy:

apt-get install apache2 -y

It should look like this:

install-apache2-ubuntu-1504

Step 4 – Once the install process is finish, continue with installing PHP5:

apt-get install php5 php5-mysql -y

screenshot:

install-php5-ubuntu-1504

Step 5 – Now install required PHP5 modules for OwnCloud to run:

apt-get install php5-gd php5-json php5-curl php5-intl php5-mcrypt php5-imagick -y

It’ll look similar to this:

install-php-modules

Step 6 – Now issue command below to install MariaDB server on your VPS. OwnCloud needs a database server to process all of its data. Currently it supports only MySQL and MariaDB.

apt-get install mariadb-server -y

pic:

install-mariadb-ubuntu-15-04

Also issue command below to setup MariaDB for the very first time:

/usr/bin/mysql_secure_installation

Simply hit Enter on your keyboard if asked with current password then answer next questions accordingly. Do not forget to create new password and remember it (It is your database password for user root).

mariadb-setup-1

setup-mariadb-2

Step 7 – Now login to Mariadb as root and create new user and new database, type in this command:

mysql -u root -p

login-mariadb-ubuntu-1504

then these few lines of command:

CREATE USER 'newdbuser'@'localhost' IDENTIFIED BY 'newpassword';
CREATE DATABASE ownclouddb;
GRANT ALL ON ownclouddb.* TO 'newdbuser'@'localhost';
FLUSH PRIVILEGES;
exit

Replace newdbuser with your own new database username. Replace newpassword with your password (no spaces). Replace ownclouddb with new database name. Here’s the screenshot of what I’d done:

create-owncloud-db

Step 8 – So we have Apache and MariaDB installed and it is time to install OwnCloud. In the time of writing, current stable version is OwnCloud v8.0.3. Your version may be different. Firstly, go to https://owncloud.org/install/ and click Download button.

download-owncloud-package

Next, you have to copy its download link (Right-click on the link and copy)

copy-owncloud-link

Go back to Putty (or Terminal) and download it using wget command:

wget https://download.owncloud.org/community/owncloud-8.0.3.tar.bz2

do not forget to change the download link

download-owncloud-package-wget

Next, extract the package to default Apache’s web folder using this command:

tar -xvf owncloud-8.0.3.tar.bz2 -C /var/www/html/

again, do not forget to change the actual OwnCloud package according to the version you’ve downloaded.

extract-owncloud-package

Step 9 – Now we have to set directory permission using this command:

chown www-data:www-data -R /var/www/html/owncloud/

chown-owncloud-folder

Step 10 – In order for Apache to be able to serve OwnCloud, we have to create new Apache configuration or virtual hosts file. First, create new configuration file for your website. In this article I use servermombox.com as example (domain not exists, just for tutorial shake). We can use Nano (my favorite text editor)

nano /etc/apache2/sites-available/servermombox.com.conf

replace servermombox.com in that command with your real domain name. Hit Enter and put this configuration in it:

<VirtualHost *:80> 
     ServerAdmin webmaster@servermombox.com
     ServerName servermombox.com
     ServerAlias www.servermombox.com
     DocumentRoot /var/www/html/owncloud
     ErrorLog /var/www/servermombox.com/logs/error.log 
     CustomLog /var/www/servermombox.com/logs/access.log combined
     <Directory "/var/www/html/owncloud">
		Options Indexes FollowSymLinks
		AllowOverride All
		Order allow,deny
		allow from all
     </Directory>
</VirtualHost>

it should look like this:

config-sites-available

Now save changes and exit (In Nano it is Control+O then Control+X).

Also create new directory to store all the log files:

mkdir -p /var/www/servermombox.com/logs

Step 11 – Now reload / restart Apache then enable the newly created virtual host file using a2ensite command:

service apache2 reload
a2ensite servermombox.com.conf

pic:

enable-config-file-apache

Setup OwnCloud

Step 12 – Now launch your favorite web browser and access your new OwnCloud website.

*p.p.s: As in this article I use servermombox.com as an example and the domain does not actually exist, so I have to edit my local hosts file which in Windows I use HostsMan app. You can also use the same method while waiting for your actual domain to resolve to your server.

edit-hosts-file-windows

In web browser you’ll see OwnCloud setup page where you have to provide few things to finish the setup process.

Create an Admin account:

owncloud-create-admin

Simply leave the Data Folder as it is and type in the MariaDB details you’ve created earlier:

Configure The Database:

config-owncloud-database

Once done, click the Finish Setup button. That’s it.

What’s next? Once installed, you can start syncing certain files and folders from your devices using OwnCloud client app.

welcome-owncloud

Also, you can create new users for your friends, family members, or even to sale your newly built cloud storage service. Enjoy..

Do not forget to follow me on Twitter for faster news update.

This post How to Install OwnCloud on Ubuntu 15.04 VPS is part of ServerMom.

How to Install Apache, PHP and MariaDB on Ubuntu 15.04

$
0
0

lamp-ubuntu-1504-feat

This is a quick and clear version of how to build a working LAMP server to host your websites with it. As a refresh, LAMP stands for Linux, Apache, MySQL and PHP which in this guide we’ll replace it with MariaDB that is faster than traditional MySQL server. As what I can remember, I wrote about LAMP installation on CentOS 7 already but never write the same thing for new Ubuntu version which is now version 15.04 codename Vivid Vervet. So, read on!

Prerequisites

  1. A server / VPS running Ubuntu 15.04 which in this guide I use its x86_64 version from DigitalOcean.
  2. SSH client app like Putty and proper knowledge to use the app.
  3. Some basic knowledge about common unix command.
  4. A cup of tea or coffee as always.

How to Install Apache 2

Step 1 – First thing first, login to your server as root (I assume you knew how to use SSH / Putty). If you are using a droplet from DO like me, you will be asked to change default root password:

Step 2 – Update Ubuntu’s packages to latest version using this command:

apt-get update -y
apt-get upgrade -y

screenshot:

Step 3 – Now here’s the main command to install Apache 2 webserver on Ubuntu 15.04:

apt-get install apache2 -y

You’ll see something similar to this:

How to Install PHP 5

Step 1 – For the first step, you can start installing PHP5 and MySQL PHP modules using this command:

apt-get install php5 php5-mysql -y

the process will be done in few seconds. Pic:

Step 2 – Install other PHP5 modules your app / script may need. There are many modules available and your app/script may need specific ones. However, you can install most common modules many apps usually need it. Here’s the command you can issue:

apt-get install php5-cgi php5-cli php5-common php5-curl php5-dev php5-gd php5-tidy php5-xmlrpc php5-xsl php5-mcrypt php5-imap php5-imagick php5-json php5-intl php5-mcrypt libapache2-mod-php5 -y

screenshot:

install-php-common-modules

Step 3 – That’s it. You can now check which PHP version is installed using this magic command:

php -v

In my example it is PHP 5.6.4

php-version-check

How to Install MariaDB Server

Step 1 – The command to install MariaDB is still the same which is:

apt-get install mariadb-server -y

screenshot:

mariadb-installation-ubuntu

Step 2 – Once the install process is finished, you have to firstly setup your MariaDB install with new root password (default is blank). Issue this command:

/usr/bin/mysql_secure_installation

Simply hit Enter on your keyboard if asked with current password then answer next questions accordingly. Do not forget to create new password and remember it (It is your database password for user root).

Step 3 – Now login to MariaDB to test your newly created root password:

mysql -u root -p

enter your MySQL root password

mariadb-login-root

As you can see from the pic above, it is MariaDB v10.0.17 which is equivalent to MySQL 5.6 & 5.7

Finally, do not forget to restart Apache 2 webserver:

service apache2 restart

that’s it. You can now start hosting your websites / blogs on it which shortly can be done this way:

How to Host A Website on Ubuntu LAMP Server

Step 1 – Create the directory where you put all your site’s files in it (web directory):

mkdir -p /var/www/example.com
mkdir /var/www/example.com/logs

the output simply looks like this:

create-directory

Step 2 – So you have now a directory where you can store all files including scripts and medias of your website. What’s next to do is to make sure Apache will know where to access when a domain name is called. Hence, you have to create a new Virtual Hosts file, a configuration block of Apache for each of your domain / sub-domain.

nano /etc/apache2/sites-available/example.com.conf

The command tells nano editor to create a new file called example.com.conf. Do not forget to change every example.com in this tutorial with your own domain name. Also, if you have no Nano installed yet, you can install it easily with this command:

apt-get install nano -y

Step 3 – Now a blank editor page will show up. Next, copy paste configuration below and adjust few lines accordingly:

<VirtualHost *:80> 
     ServerAdmin webmaster@example.com
     ServerName example.com
     ServerAlias www.example.com
     DocumentRoot /var/www/example.com
     ErrorLog /var/www/example.com/logs/error.log 
     CustomLog /var/www/example.com/logs/access.log combined
     <Directory /var/www/example.com>
        Options Indexes FollowSymLinks
        AllowOverride All
        Order allow,deny
        allow from all
     </Directory>
</VirtualHost>

here’s an example:

apache-domain-conf-file

Save it and exit Nano editor (Control+O then Control+X).

Step 4 – Reload Apache to be able to read a new configuration file.

service apache2 reload

Step 5 – You can then enable the Virtual Hosts (configuration) file using this command:

a2ensite example.com

a2ensite-command

You can then test it by creating a phpinfo file:

nano /var/www/example.com/info.php

and put this line in there:

<?php phpinfo(); ?>

phpinfo-ubuntu-1504

Save it and exit Nano editor (Control+O then Control+X).

Open up your browser and type:

http://example.com/info.php

then you will now see a bunch of configuration details of your installed PHP.

Step 6 – This is optional but you may need it if you are using WordPress:

chown www-data:www-data -R /var/www/example.com
chmod 755 /var/www/example.com

That’s all. Do not forget to follow me on twitter to get quicker notification of new update.

This post How to Install Apache, PHP and MariaDB on Ubuntu 15.04 is part of ServerMom.

How to Install Nginx, HHVM and MySQL on Ubuntu 15.04 (LNMH Stack)

$
0
0

install-hhvm-ubuntu-vps

We knew and heard a lot about LAMP and LNMP, but what about LNMH stack? Wait what? Where is the P part that stands for PHP? Where does it go and what is the H part there? Meet HHVM, an open-source virtual machine designed for executing programs written in Hack and PHP. Early, HHVM is developed by Facebook because the regular Zend+Apache combination is not as efficient to serve large applications built in PHP. It performs very well and proven serving over a 9x increase in web request throughput and over a 5x reduction in memory consumption for Facebook compared with the Zend PHP engine + APC. Shortly saying, HipHop Virtual Machine (HHVM) is a virtual machine developed and open sourced by Facebook to process and execute programs and scripts written in PHP and Hack language. HHVM can be used together with a FastCGI-based webserver like nginx or apache.

In this article, we’ll try to learn how to install Nginx web server, MySQL and HHVM on Ubuntu 15.04 VPS which then we can install WordPress to run on it. A tutorial with pictures.

Prerequisites

  1. A server (vps, cloud, dedicated) running Ubuntu 15.04 Vivid Vervet x64. For your information, HHVM doesn’t support any 32 bit operating system and they have no plans to add support for 32 bit operating systems. In this guide I use a droplet from Digital Ocean with 1GB RAM that costs $10/month but for this tutorial I spent only $0.030 (2 hours). That’s what I like from DO as they charge hourly so I can simply create a server and destroy it every time I want to write a tutorial or test something. You can see my setup to create a droplet at DO here.
  2. Some basic knowledge of common Unix command.
  3. Some basic knowledge about Putty (Window) or Terminal (Linux).
  4. A cup of coffee or tea.

How to Install Nginx

Step 1 – Login to your server as root or as a user with root privilege (sudo). If you are using a VPS from DO, you should be also asked to change given root password.

login-root-ubuntu-hhvm-tut

Step 2 -Update all packages and dependencies of your VPS with this magic command:

apt-get update && apt-get upgrade -y

screenshot pic:

upgrade-dependencies-packages-hhvm

Step 3 – Issue this command to install Nginx on your Ubuntu 15.04 vps easily:

apt-get install nginx -y

It looks similar like this:

install-nginx-hhvm

How to Install MySQL

Step 1 – So you have Nginx installed as web server. Now you can proceed to install MySQL database server which is generally needed by many scripts / apps including WordPress and Joomla. Issue this command:

apt-get install mysql-server -y

The installation should be done in seconds:

install-mysql-hhvm

Step 2 – Once installed, you will then need to setup basic MySQL configuration including to create new password for MySQL root user.

mysql_secure_installation

screenshot (click it to see larger version):

mysql-config

How to Install HHVM

Step 1 – So you have Nginx and MySQL in place. Now let’s enter to the main menu which is to install HHVM on your vps. But firstly you have to issue several commands to download the required HHVM package.

apt-key adv --recv-keys --keyserver hkp://keyserver.ubuntu.com:80 0x5a16e7281be7a449
add-apt-repository 'deb http://dl.hhvm.com/ubuntu vivid main'

pic:

download-key-server-ubuntu-hhvm

Step 2 – Do apt-get update so the new repository can be applied:

apt-get update -y

it looks like this:

apt-get-update-hhvm-repo

Step 3 – Finally use this command to install HHVM on your VPS:

apt-get install hhvm -y

the process should finish in seconds:

install-hhvm-on-ubuntu

If the process gone well, you should also see this welcome message:

hhvm-installed

Step 4 – Now you have to run the install script that will install HHVM module for Nginx. Issue this command:

/usr/share/hhvm/install_fastcgi.sh

you’ll see something like this:

configure-hhvm-nginx

Configure Nginx Virtual Host for HHVM

Step 5 – Assuming you want to add new website called example.com, so create new virtual host file. You can use any text editor but in my guide I use Nano:

nano /etc/nginx/sites-available/example.com.conf

Step 6 – Then copy paste this configuration there:

server {
  listen 80;
    server_name example.com;
    include hhvm.conf;

    access_log   /var/log/nginx/access.log;
    error_log    /var/log/nginx/error.log;

    root /var/www/example.com;
    index index.php;

    location / {
        try_files $uri $uri/ /index.php?$args; 
    }
}

Once done editing, simply Save and Exit the editor which is in Nano: Control+O then Control+X.

nginx-hhvm-conf

Step 7 – Now create your web directory and do some chmod and chown-ing stuff:

mkdir -p /var/www/example.com
chmod -R 755 /var/www/example.com
chown -R www-data:www-data /var/www/example.com

pic:

create-web-directory-nginx

Step 8 – Now enable your newly created virtual hosts file by linking it:

ln -s /etc/nginx/sites-available/example.com.conf /etc/nginx/sites-enabled/example.com.conf

Step 9 – Finally restart Nginx and HHVM:

service nginx restart
service hhvm restart

illustration:

2015-05-24_220811

Step 10 – Now give it a test, create a test.php file to confirm if HHVM is running and working:

nano /var/www/example.com/test.php

then put this in that file:

<?php
echo  defined('HHVM_VERSION')?'HHVM is up and working':'Sorry Not using HHVM';
?>

pic:

test-hhvm-running

Hit Control+O to save then Control+X to exit the editor.

Step 11 – Now open up your browser and open the newly created HHVM test file and Voila!!

hhvm-is-working

That’s it and congratulation you now have HHVM running on your vps and is capable to serve PHP scripts much more faster and efficient plus Nginx on top of that so your website will now faster.

This post How to Install Nginx, HHVM and MySQL on Ubuntu 15.04 (LNMH Stack) is part of ServerMom.

How to Install WordPress on Nginx + HHVM VPS

$
0
0

Just a short tutorial with pictures about how to install a WordPress on Ubuntu VPS running Nginx, HHVM and MySQL. Using HHVM replacing PHP is somehow believed can server website faster and it is very lightweight for server’s resources. While not many PHP scripts are made compatible, WordPress is claimed compatible with HHVM (since version 3.9). So if you want to build fast-loading a WordPress blog using bleeding edge technology, try running it with HHVM.

Building HHVM + Nginx Server

Step 1 – Follow all steps in my previous tutorial and make sure you have installed it correctly.

Read:
How to Install Nginx, HHVM and MySQL on Ubuntu 15.04

Step 2 – Create new web directory for you WordPress blog. In this example I use my a sub-domain (coz I have no spare idle domain), feel free to replace it with your own.

mkdir -p /var/www/example.org
chmod -R 755 /var/www/example.org
chown -R www-data:www-data /var/www/example.org

Replace example.org with your own domain / subdomain name, in my case it looks like this:

create-new-hosts-file

Step 3 – Now let’s create new virtual hosts file for your upcoming WordPress site:

nano /etc/nginx/sites-available/example.org.conf

then copy paste this configuration:

server {
  listen 80;
    server_name example.org;
    include hhvm.conf;
 
    access_log   /var/log/nginx/access.log;
    error_log    /var/log/nginx/error.log;
 
    root /var/www/example.org;
    index index.php;
 
    location / {
        try_files $uri $uri/ /index.php?$args; 
    }
}

In my case it looks like this:

test-servermom-nginx

Now save changes and exit the editor (in Nano it is Control+O to save then Control+X to exit).

Step 4 – Now we need to create symbolic link to the new virtual hosts file so it can be enabled:

ln -s /etc/nginx/sites-available/example.org.conf /etc/nginx/sites-enabled/example.org.conf

Next, restart Nginx:

service nginx restart
service hhvm restart

pic:

symbolic-link-nginx

Install WordPress

Step 1 – Obviously we have to firstly download WordPress to our vps:

wget http://wordpress.org/latest.tar.gz

download-wordpress

Step 2 – Now copy latest.tar.gz file to your web directory and extract the main WordPress files inside that package while also removing the wordpress directory using this command:

cp latest.tar.gz /var/www/example.org
cd /var/www/example.org
tar -xzvf latest.tar.gz --strip-components=1

Step 3 – Login to MySQL as root then create new user, password and database name:

mysql -u root -p

then issue these command lines replacing “wordpress”, “dbuser” and “pass123456″ with your own:

CREATE DATABASE wordpress;
CREATE USER dbuser@localhost;
GRANT ALL PRIVILEGES ON wordpress.* to dbuser@localhost IDENTIFIED BY 'pass123456';
FLUSH PRIVILEGES;
quit

screenshot:

mysql-create-new-db

Step 4 – Rename wp-config-sample.php file to wp-config.php then edit it using your favorite editor like Nano:

mv wp-config-sample.php wp-config.php
nano wp-config.php

then provide new MySQL credentials you’ve just created, here’s the example of mine:

wp-config-edit

Step 5 – Open up your favorite web browser and navigate to your domain which in my case is test.servermom.org and proceed with the installation procedure:

install-wordpress-in-browser

Hit the continue button then fill in all required fields:

install-wordpress-in-browser2

That’s it. You can now login to WordPress Dashboard.

install-wordpress-in-browser3

Enjoy your newly built WordPress site. Do not forget to follow me on Twitter or subscribe to my newsletter (via FeedBurner) so you’ll get noticed about new articles faster.

This post How to Install WordPress on Nginx + HHVM VPS is part of ServerMom.

Quick Server Performance Benchmark Tools

$
0
0

These two free tools allow you to conduct quick test on your server to easily find out its general info and performance. This can be a quick solution to answer your curiosity of a server / VPS you’ve just purchased.

1. FreeVPS.us Benchmark Script

This script is the one I see a lot in many forums and blogs. By issuing a one-liner command you can fetch quick information about your server including CPU Model, number of cores, CPU frequency, total amount of RAM, SWAP, system uptime and of course perform quick test of download speed as well as I/O speed. The command to use this script is below:

wget freevps.us/downloads/bench.sh -O - -o /dev/null|bash

here’s an example of my VPS from latest VPSDime’s promo:

vpsdime-freevps-bench

2. vHWINFO

Created by Rafa Marruedo, vHWINFO is just similar tool but it only performs one download speed test which is from CacheFly. Also, the last time I use it shows I/O speed as well but lately the result doesn’t show up. The script you can use is:

wget –no-check-certificate https://vhwinfo.com/vhwinfo.sh -O - -o /dev/null|bash

or use this if that one is not working…

wget --no-check-certificate https://github.com/rafa3d/vHWINFO/raw/master/vhwinfo.sh -O - -o /dev/null|bash

Again, here’s example of what I tested my vps from VPSDime:

vpsdime

and this one from RamNode

ramnode

That’s it.

However those two tools are not the only script to perform benchmark but I consider it as the quickest and simplest available. If you want to, you can perform more comprehensive benchmark using ServerBear script or do the network speed test or I/O speed test manually. Feel free to add another similar tool. Gracias,..

This post Quick Server Performance Benchmark Tools is part of ServerMom.

Unboxing Atlantic.net Cloud Server

$
0
0

I really am very curious about Atlantic.net cloud server but I never had chance to try it until recently Marty (founder and CEO) offers me free credit to give their cloud service a try. So this is my first / initial review of cloud hosting service from Atlantic.net and the result as below:

Cloud Server Specification

I use their L Server plan which has following specs:

  • 4 GB RAM
  • 2 vCPU (processor)
  • 100GB SSD storage
  • 5TB bandwidth (transfer)
  • node: New York City (East Coast)
  • and I run CentOS 6.5 x86_64 on it.

FreeVPS.us Test Script

atlantic-net-freevps-test

The result shows it has 2099.998 MHz processing power while download speed from several US, EU and Asia locations is fairly fast.

vHWINFO Test

atlantic-net-vhwinfo-test

The test shows clear basic information about the server I use including its OS, Kernel version, Virtualization, number of CPUs and its speed, also the amount of RAM, Disk and 10MB speedtest from CacheFly.

Simple DD Test

atlantic-net-dd-test

The result is 339 MB/s which I can say it is commonly fast.

atlantic-net-speedtest-test

I performed two times test of SpeedTest to find out how fast its connectivity and the result is – I can say – very fast.

speedtest atlantic.net result

Short Conclusion

From very basic (and common) test above I can say the result is GREAT but not yet excellent. Why? Firstly because I/O speed around 150* – 300 MB/s is pretty much fast but there are several providers offering SSD can achieve 400 – 1 GB/s even if I can say most SSD VPS I use are having average I/O speed of 500 MB/s. However if you plan to use the cloud server to host websites, I believe you and your user may not feel the difference so this is not a big problem. The I/O speed at that rate is more then needed to run a webserver either Nginx, Apache, Lighttpd, Hiawatha, Open LiteSpeed or any web server you want.

* I got 153 MB/s at their US East 1 (Orlando, FL)

Uptime and Response Time

That is the part I can not answer right now because it needs time to gather some data about how reliable their cloud server is in term of uptime and response time. Since it is my initial review so I will update this post or may be post another review after X months later. And to test that, I will move this blog to their cloud server soon.

About Atlantic.net

atlantic-net-homepage

Atlantic.net is privately held company having headquarter at 440 West Kennedy Blvd Orlando, Florida 32810 United States. The company was founded in 1994 and said being a market-leading hosting solutions provider renowned for providing exceptional infrastructure as a service, simplifying complex technologies, and building a trusted brand.

They’ve improved a lot and as what Marty (founder & CEO) said to me that Atlantic.net strives to improve more and more to be #1 market leader in cloud server industry. Their web page has also changed since last time I visited which now more intuitive, eye-catching, user-friendly, easy to use, simple and responsive.

Key Features

  1. Some key features about Atlantic.net cloud server are :
  2. Deploy a cloud server in only 30 seconds
  3. Per second billing (while competitors use hourly)
  4. 100% pure SSDs in RAID setup
  5. 24/7 technical support (Live Chat available)
  6. Windows and Linux supported
  7. Free Unlimited inbound and up to 7TB of outbound traffic (bandwidth)
  8. Multiple locations available (San Fransisco, Orlando, Dallas, New York, and Toronto while London and Singapore are coming soon)
  9. Daily backup (available as an addon)
  10. Guaranteed CPU cycles + ability to burst
  11. API available
  12. Various Linux Distros are available
  13. Ready to use deployable apps image including LEMP, LAMP, WordPress, and even Docker.

Pros

  1. They are not a fly-by-night company (has been in business since 1994)
  2. Competitive pricing
  3. They own and operate SSAE 16 TYPE II certified data center
  4. 24/7/365 live support.
  5. Support ticket response time is also fast (I tried)
  6. Per-second basis billing
  7. Windows OS template is also available
  8. 30 seconds cloud server deploy time
  9. Easy to use web interface (custom control panel)

Cons

  1. They don’t accept Paypal yet (soon will be available)
  2. Doesn’t have IPv6 yet
  3. Password Reset needs to open ticket via email
  4. In some Distros: wget needs to be installed manually (not included) and hostname need resetup.

I already like their simple distraction-free control panel where users can manage their cloud servers easily. But the Founder said they will soon release new redesigned new “add server” page plus some new plans and templates. Wow,.. that will add another awesomeness. Curious enough? Go check all available cloud server plans here.

Useful Links:

  • Contact and Support [link]
  • Speed Test [link]
  • Network Status [link]
  • Service Policies [link]
  • FAQ [link]

Have experience using their service before? Do not hesitate to share your opinion with us via comment section below.

p.s: So sorry if the tittle is misleading because there is no real unboxing activity. It is just for the eye-catching tittle and to show readers that I just have a new cloud server at new provider (I mean it’s new for me).

This post Unboxing Atlantic.net Cloud Server is part of ServerMom.

Using NixStats to Monitor Server Performance

$
0
0

About few weeks ago I’ve posted a handy list about free uptime monitoring tool either self-hosted or web apps hosted by third-parties (ready-to-use). In this article I will show you how useful it is to use NixStats to monitor your website’s not just for uptime but also to monitor the performance of your server.

Meet NixStats.com, a website offering free service to monitor and display statistic of your server performance so you can find out how your current server setup affecting CPU load or what consumes your server RAMs. But it is not just that, NixStats offers more data to grab and displays it on very nice web pages. If you ever knew or used NodeQuery, then NixStats is just similar service and being a head-to-head competitor.

Also Read:

Currently at the time I write this article, NixStats is still in Beta version so it has not so much information even a simple “About” page. Anyway, I tested the service in looks and works pretty good. Several members on LET say they love the uptime monitoring from NixStats. Personally I like its user interface as well as its public Status Page.

Curious? Go check my status page out here:
http://uptime.servermom.org/

Sign Up for a Free Account

I don’t quite sure for how long they will offer free sign up but while in Beta mode they are surely in need for more users to test their service and hopefully can give feedback. So be quick and grab one there.

Go to https://nixstats.com/login and click the Sign Up link. Now fill in all required fields including your email address and password. Use BETA as the invitation code.

nixstats-1

Then click the big orange Sign up button.

Once logged in, you will see there are mainly four main sections of NixStats interface: Dashboard, Status Pages, My Domains and My Servers. Dashboard is the main page where you can see the summary of all your servers’ performance which in my case it looks like this:

nixstats-2

Status Pages area is the place where you can create a custom public status page to display server monitoring result without having to login to NixStats Dashboard. The best part, URL of Status Page is customizable via CNAME.

Next, My Domains is the section where you can add, delete or manage all your domains you monitor using NixStats. Domain monitoring is in simple term another word of uptime monitoring.

Go ahead type in your domain name you wish to monitor for its uptime then click the green Add Domain button.

nixstats-3

Once added, click on the domain link and define some notification settings, including your email address.

nixstats-4

All right!! that was easy wasn’t it? Now let’s enter to the next section, My Servers. It is an area to display all of your added servers. If this is your first time then you need to add a server first. The way to add a server in your monitoring list is pretty easy, simply login to your server and issue command below:

wget --no-check-certificate -N https://api.nixstats.com/install.sh && bash install.sh 55748879xxxxxxx4567

Please replace 55748879xxxxxxx4567 with the one you get in email.

Once the command executed, there will be a new server added automatically in your My Server page.

nixstats-5

That’s it. You can repeat the “Add a Domain” and “Add a Server” part for each of your server or websites.

Once added, you check the overview of how your server performs:

nixstats-6

Finally, do not also forget to create a public Status Page, simply click the Status Pages link in the left menu.

Click the green Create a Page button and in the next page, fill in all required fields:

  • Enter the Page Title
  • Upload a logo image
  • Define custom hostname
  • Choose the domains you wish to display it status
  • Choose the servers you wish to display it performance

That’s it. So, what do you think about NixStats? Ever used it before or found another alternative?

This post Using NixStats to Monitor Server Performance is part of ServerMom.


Build A Cloud Server Faster On Atlantic.net

$
0
0

There are many cloud server providers offering almost the same main features like: hosted on cloud infrastructure, hourly billing, flexible resource scaling and of course easiness to build it. While provisioning time of its competitors like Digital Ocean is 55 seconds and Vultr is within 60 seconds, Atlantic.net can deliver your cloud server in 30 seconds which is almost twice faster.

Also Read:

Curious? Let’s start.

Step 1 – Visit Atlantic.net on your favorite web browser and sign up for a new account using only your email address.

2015-06-09_205203

Step 2 – Add some credit to your account so you can spin up a server.

Step 3 – Once you have credit to spend, go ahead click the Add Server button in the Servers page.

2015-06-09_205451

Step 4 – In the next page you can see several options you have to choose regarding the server you wish to build. For your information, this Add a Server page has just launched today so it is a brand new design. Congratulation Marty for the awesome new design! Now enter your server name and you better keep it simple and short (e.g: your site’s name):

2015-06-09_210038

Step 5 – Scroll down the page a bit and pay attention to the Location section. Currently Atlantic.net’s infrastructure is available at 5 locations: Orlando, FL – New York City, NY – Dallas, TX – San Fransisco, CA – and Toronto, Canada (they plan to expand to London – UK and Singapore – SE Asia, soon). In this example I choose Dallas, Texas.

2015-06-09_211805

Step 6 – Below that section you can then choose which Operation System you wish to install and will have it running on your very own cloud server. Currently they have all most popular selection of Linux Distros including:

  1. Ubuntu 12.04 – 15.04 (32-bit or 64-bit)
  2. CentOS 6.6 (32-bit or 64-bit) – 7.1 (64-bit)
  3. Debian 7.8 – 8.0 (32-bit or 64-bit)
  4. Fedora 20 – 22 (32-bit or 64-bit)
  5. FreeBSD 10.1 (64-bit)
  6. Arch Linux (64-bit)

The best part, you can also install Windows 2008 0r Windows 2012 Detacenter edition.

2015-06-09_212600

That’s not all, there are also several ready-to-use apps you can deploy on your server to avoid manual setup. Click the Applications tab and you’ll see LAMP, LEMP, WordPress, NodeJS, cPanel and Docker.

2015-06-09_212826

For this tutorial I choose to use CentOS 7.1 64-bit.

Step 7 – Now choose a plan for your server. Each plan has its own allocated resources including RAM, vCPU and the capacity of SSD. Currently there are 6 plans available but according to their CEO there will be another upcoming 2 plans offering larger RAM (32GB and 64GB).

2015-06-09_213210

Step 8 – In the very bottom of that page is optional stuff: SSH Key and Enable Backups. That’s up to you but for this tutorial I simply leave it as it is (I don’t setup SSH key and backup). Finally click the blue Create Server button.

2015-06-09_213547

Step 9 – Once clicked, the automatic system will get your cloud server ready in 30 seconds.

2015-06-09_213651

Step 10 – That’s it. Your cloud server is provisioned and now ready to use. All details displayed within that page and also emailed to your inbox.

2015-06-09_213958

Finally you can open up either Putty or Terminal and login to your newly built server using that credentials. P.s: default SSH port is still 22. Have fun!

This post Build A Cloud Server Faster On Atlantic.net is part of ServerMom.

How to Create SWAP File On CentOS Server

$
0
0

How To

This is a very basic guide: creating a Swap file on your CentOS server to act as a backup RAM space. Well, this task is optional but you better create one (if your VPS doesn’t come with Swap yet) to avoid OOM (Out of Memory) error. For your information -in case you didn’t know it yet- a Swap file can be described as a small amount of space created on a servers hard drive (or SSD) to simulate and act as backup RAM.

Using a HDD as RAM is probably not very good idea but it is a good practice especially in the event when your server is out of memory and you couldn’t effort to add more RAM immediately. In the ideal situation using SSD is really recommended.

Ingredients of this tutorial

  1. A server / VPS with enough RAM and HDD or SSD. In this article I use a 512MB cloud server from Atlantic.net. Do not have one? Read my list of recommended VPS providers as well as this list of 20 low end cloud server providers.
  2. A CentOS Distro installed (I use CentOS 7)
  3. Putty and basic knowledge on how to use it.
  4. A computer or laptop to access your server
  5. A cup of coffee or tea.

So here it is a simple tutorial you can follow. Let’s start with common rule of how large is a swap file should be created. The most common practice is to add half of your existing RAM up to 4GB. For example: if you have 1GB actual RAM allocated to your vps, then you can create about 512MB swap file.

The simple calculation is:

1024 block size x 512MB = 524288 block size. Now add that to the command:

dd if=/dev/zero of=/swapfile bs=1024 count=524288

it simply looks like this

2015-06-10_225908

Next, create a swap file area using this command syntax:

mkswap /swapfile

pic:

2015-06-10_225946

Define the owner of the newly created swap file and swap area then set correct permission on it:

chown root:root /swapfile
chmod 0600 /swapfile

Activate Swap you newly setup using this command:

swapon /swapfile

Finally, issue command below to verify that Swap has been setup and enabled:

swapon -s

screenshot:

2015-06-10_230104

The last thing to do is to configure Swap to run and enabled each time your server reboots. Use Nano editor (or vi) to adjust fstab setting:

nano /etc/fstab

then add following line at the very bottom:

/swapfile           swap   swap     defaults     0 0

which in my case it looks like this:

2015-06-10_230340

Save changes and exit the editor (in Nano it is Control+O then Control+X).

From here on, each time you check your RAM usage using free -m command, it should display your swap too.

2015-06-10_230242

This post How to Create SWAP File On CentOS Server is part of ServerMom.

$10/yr 256MB RAM 4 CPU Core at HTTPZoom

$
0
0

2015-06-11_111138

This offer may cost $10 per year for an OpenVZ VPS with 256MB of RAM. But what interested me is its CPU, users can have access to 4 cores CPU shared with other users. At a glance, HTTPZoom is some kind of child company of Precision Technology Consulting Limited having experience around 20 years in the industry. That is the same parent company of Dedify.com.

And here it is their best deal:

Plan: BOVM – 256MB  (order)
Virtualization – OpenVZ
Price $3.25 / Month
$10 / Year with Coupon: AY50OFF (Usually $20.00 /Year)
CPU – 4 Cores Shared
Dedicated Ram – 256MB
vSwap – 256MB
Diskspace – 20GB
Bandwidth – 500GB
IP Addresses – 1 @ 1000 mbps Port
Location: Arizona – US
SolusVM Control Panel

They also have plenty of payment options including: Paypal, BitCoin, Skrill, Bank Transfer. Some payments may not be available during sign up and contact will be required to activate the method. All price exclude UK VAT.

Also check out their another best deal:

Plan: BOVM – 512MB  (order)
Virtualization – OpenVZ
Price $4.46 / Month
$15 / Year with Coupon: AY50OFF (Usually $30.00 /Year)
CPU – 4 Cores Shared
Dedicated Ram – 512MB
vSwap – 512MB
Diskspace – 25GB
Bandwidth – 500GB
IP Addresses – 1 @ 1000 mbps Port
Location: Arizona
SolusVM Control Panel

This post $10/yr 256MB RAM 4 CPU Core at HTTPZoom is part of ServerMom.

cPanel to CWP Migration Tutorial

$
0
0

A Complete Guide

CentOS Web Panel (CWP) has recently being one of most popular free control panel. It is a great alternative especially when zPanel project has been shut down. Its sleek user interface makes users enjoy managing websites on their servers easily. I personally like CWP and being my second alternative after VestaCP. One of my favorite CWP’s feature is its ability to perform cPanel backup restoration make it easier to restore full website backup created by famous cPanel CP.

So here it is a complete guide (with pics) on how to move a website from cPanel to CWP automagically using full cPanel backup. You don’t even have to download the backup file to your local PC / laptop as we are also going to use wget. I’ll try to write the tutorial easy-to-understand so do not hesitate to tell me in which part makes you confused. Let’s start..

Ingredients

  1. A server / VPS running CentOS 6.5 or 6.6 either 32-bit or 64-bit. However if your VPS has only 512MB RAM, then go with 32-bit. Need recommendation? Read my recommended VPS providers list.
  2. A basic knowledge about common Unix command to SSH to your server.
  3. SSH client like Putty or Terminal and ability to use it.
  4. A spare time of yours
  5. A cup of coffee or tea.

In this tutorial I use a 512MB cloud server from Atlantic.net running CentOS 6.6 32-bit with CWP v0.9.8.6. I will move my friend’s old website from cPanel to CWP so make sure you you change the domain name replacing it with yours.

Preparation

Step 1 – Login to your server as root and follow my guide to install CWP.

Step 2 – Perform some basic CWP setup tasks.

Step 3 – Do not change your domain’s NS yet until you migrate the websites.

Backup cPanel

Step 1 – Login to your cPanel account using username and password given by your webhosting provider:

2015-06-12_220715

Step 2 – Once you logged in to cPanel, click the Backup Wizard icon > click the Backup button > then click the Full Backup button. See illustrations below:

2015-06-12_220957

2015-06-12_221047

2015-06-12_221107

Step 3 – In the next page, make sure you choose “Home Directory” as Backup Destination. In case if your hosting account has many files consume large amount of disk space, you better also provide an email address to send notification when the backup process complete. Finally click the Generate Backup button.

2015-06-12_221143

Step 4 – Now go back to cPanel homepage and open up File Manager, choose the Home Directory then click the Go button.

2015-06-12_222002

2015-06-12_222100

Step 5 – In the File Manager page you’ll see the newly created backup file with .tar.gz ending. Right click on it and choose Move. Now type public_html as the destination.

2015-06-12_222228

2015-06-12_222255

Step 6 – Then go to public_html directory, find the backup file, right-click on it and change its permission to 644:

2015-06-12_222358

Step 7 – Right-click on that file again and choose Rename then change its name with cpmove- prefix followed with the account name.

Format: cpmove-(USER).tar.gz
Example account test: cpmove-test.tar.gz

2015-06-12_231306

The Migration

Step 1 – Now go back / login back to your server / VPS as root and go to /home directory.

2015-06-12_223500

Step 2 – It is time to transfer the full cPanel backup file to your VPS using simple wget command:

wget http://domain.tld/cpmove-user.tar.gz

2015-06-12_231640

Do not forget to replace domain.tld and cpmove-user.tar.gz accordingly. See screenshot pic above.

Restoring to CWP

Step 1 – So now you have the full cPanel backup file in your VPS located in /home directory. CWP need it to be placed in that location. Open up your favorite browser and login to CWP control panel as root.

2015-06-12_224651

Step 2 – Once logged in, click the User Accounts menu at the left then choose cPanel Migration sub menu.

2015-06-12_224851

Step 3 – In the next page, type in the username part of the file name then hit the Search button.

2015-06-12_231940

Step 4 – Next, you will see something like this below, now click the Restore button.

2015-06-12_232030

Step 5 – You’ll then see new page asking you to create new account. Fill in all required fields accordingly. See example below. Do not forget to click the Create button.

2015-06-12_232143

Step 6 – That’s it. You’ll then see a page similar to this one below indicating the restore process has completed.

2015-06-12_232252

Finishing Up

The migration is almost complete. The very last thing to do is now to change the NS record of your domain. Go to your domain registrar and change current NameServers to the new ones belong to your server. Wait till all DNS propagates then give your newly moved sites a test confirming all functions of your websites are working. Enjoy..

This post cPanel to CWP Migration Tutorial is part of ServerMom.

Master – Slave MySQL Replication Tutorial for Newbie

$
0
0

In this guide I will show you practical steps (with pictures) how to setup MySQL Replication in Master – Slave mode on either CentOS or Ubuntu server. I believe MySQL replication technique is not expert-only stuff but even newbies can learn and use this technique. In case if you didn’t know yet, let’s start with a short introduction about what is it.

Meet MySQL Replication

MySQL Replication is a method to create synced backup of your MySQL database. You can call it hot backup or a backup that’s always up-to-date and ready-to-use in case the main one crashes or down. Master – Slave replication is just one of available mode that is commonly used in many production system. So this tutorial is the simplest one (one master will send information to a single slave) which newbies can follow and use it at their production servers. Better take backup than not!

What’s the main purpose of MySQL Replication? It is to create a redundant MySQL server setup which is also very useful in terms of Data Security, Fail-over Solution, Database Backup from Slave, Analytics (to analyze it without using the main database), etc.

Ingredients:

What you’ll need:

  • Two VPS servers: this can be in single node, same providers, or at separate / different nodes (different providers / locations). Need recommendation? See my list of recommended providers or the 20 low end cloud servers.
  • Either CentOS or Ubuntu running on top of it
  • Note down Master and Slave IPs.
  • About 30 minutes of your time
  • A cup of coffee or tea

What I use in this tutorial:

  • A 512MB RAM cloud server from Atlantic.net as Master server.
  • A 512MB RAM droplet from Digital Ocean as Slave server.
  • Both running CentOS 6.x 32-bit
  • MySQL version I use is v5.1.73 at both Master and Slave.
  • A cup of Torabika coffee.

Preparation

First thing first, you have to install MySQL server on both Master and Slave server. In case if you haven’t installed it yet, you can follow my previous articles:

Do not forget to note down the password of MySQL root user.

FYI, you can also have MySQL server installed via Control Panel software like Vesta CP at Master server while install ONLY MySQL server manually on Slave.

Before we step up, I use these imaginary IPs which you can replace with your own IPs:

Master server: 111.111.111.111

Slave server: 222.222.222.222

Setup MySQL Master Node

Do these steps on Master Node:

Step 1 – Edit MySQL configuration file using your favorite text editor like vi or Nano. Command below uses Nano editor:

## On Ubuntu
nano /etc/mysql/my.cnf

## On CentOS
nano /etc/my.cnf

You may firstly need to edit IP binding configuration (especially in Ubuntu). Change 127.0.0.1 at bind-address with the IP of your Master server

bind-address            = 127.0.0.1

## change 127.0.0.1 with IP address of your Master node
bind-address            = 111.111.111.111

Step 2 – Now put these lines right after the [mysqld] section:

server-id=1
binlog-do-db=databasename
relay-log=/var/lib/mysql/mysql-relay-bin
relay-log-index=/var/lib/mysql/mysql-relay-bin.index
log-error=/var/lib/mysql/mysql.err
master-info-file=/var/lib/mysql/mysql-master.info
relay-log-info-file=/var/lib/mysql/mysql-relay-log.info
log-bin=/var/lib/mysql/mysql-bin

Change databasename with the database name you want to replicate / copy it to the Slave server. You can include more than one database by repeating this line for all of the databases you will need. I use servermomdb as my database name for this example. Screenshot pic:

2015-06-15_211112

Once done, save changes and exit the editor. In Nano it is Control+O then Control+X.

Step 3 – You can now restart mysql service:

service mysql restart

2015-06-14_233853

Step 4 – Login to MySQL shell as root using password you defined :

mysql -u root -p

2015-06-14_234240

Step 5 – Here’s a little bit tricky part. Pay attention closely to each command is issued inside MySQL shell. What you are going to do is: to create the slave user and grant privileges for replication task, flushing privileges and lock the database.

GRANT REPLICATION SLAVE ON *.* TO 'replicauser'@'222.222.222.222' IDENTIFIED BY 'replicapass';
FLUSH PRIVILEGES;
FLUSH TABLES WITH READ LOCK;

Do not forget to replace replicauser, 222.222.222.222 and replicapass accordingly.

  • replicauser = is new MySQL user for replicating purpose.
  • 222.222.222.222 = is Slave IP
  • replicapass = is password for the new MySQL user.

Here’s an illustration of mine. I use servermom as user and a1b2c3d4 as password:

2015-06-15_205601

Step 6 – You’ll need to find out the mysql-bin name and its Position then note it down (I simply open up Notepad and note it there). Still in MySQL shell, use command below:

SHOW MASTER STATUS;

it should give you output similar to this:

2015-06-15_210705

In my case I have to note the mysql-bin.000002 and 106, yours will be different.

Step 7 – You can now exit MySQL shell:

quit;

and continue by exporting the database file you wish to copy it to the Slave:

mysqldump -u root -p databasename > databasename.sql

change databasename with yours.

2015-06-15_211417

Transfer The Database to Slave

It’s time to transfer / copy your database to the Slave server. You can do this using SCP.

This is the easiest method available. The command is:

scp -P 22 /root/databasename.sql root@222.222.222.222:/root/

Change 22 with specific SSH port (if you changed it) of your Slave server., also change databasename.sql and 222.222.222.222 with yours. Example of mine:

2015-06-15_212438

Setup MySQL Slave Node

Leave the first server (Master node) for a while and now login to your second server which is the Slave node as root. Issue all command in this section only on Slave node.

Step 1 – Edit MySQL configuration file using your favorite text editor like vi or Nano. Command below uses Nano editor:

## On Ubuntu
nano /etc/mysql/my.cnf

## On CentOS
nano /etc/my.cnf

Step 2 – Now let’s configure MySQL configuration file in your Slave server. Copy paste these configuration right after the [mysqld] section:

server-id=2
master-host=111.111.111.111
master-connect-retry=60
master-user=replicauser
master-password=replicapass
replicate-do-db=databasename
relay-log = /var/lib/mysql/mysql-relay-bin
relay-log-index = /var/lib/mysql/mysql-relay-bin.index
log-error = /var/lib/mysql/mysql.err
master-info-file = /var/lib/mysql/mysql-master.info
relay-log-info-file = /var/lib/mysql/mysql-relay-log.info
log-bin = /var/lib/mysql/mysql-bin

Change 111.111.111.111 with IP address of Master server. Change replicauser, replicapass and databasename with yours. Example:

2015-06-15_214511

Save changes and exit text editor which in Nano it is Control+O then Control+X.

Step 3 – Login to MySQL shell as root:

mysql -u root -p

pic:

2015-06-15_213456

Step 4 – Create new database with same name then exit MySQL shell:

CREATE DATABASE databasename;
quit;

replace databasename with your own real database name. Example:

2015-06-15_213659

Step 5 – Restore database you have transferred previously using this command:

mysql -u root -p databasename < databasename.sql

Step 6 – Restart MySQL server to apply / load changes:

service mysqld restart

example:

2015-06-15_214956

Step 7 – Login back to MySQL shell as root to do some important tasks:

mysql -u root -p

First task is to stop the Slave so you can define where to look for Master log file.

slave stop;
CHANGE MASTER TO MASTER_HOST='111.111.111.111', MASTER_USER='replicauser', MASTER_PASSWORD='replicapass', MASTER_LOG_FILE='mysql-bin.000001', MASTER_LOG_POS=12345;

Change 111.111.111.111, replicauser, replicapass, mysql-bin.000001 and 12345 with yours. Example of mine:

2015-06-15_215900

Once done, now you can start Slave and show its status with this command:

slave start;
show slave status\G

It will give you an output similar to this:

2015-06-15_220403

If you see something similar to above pic then you are success. There are few lines to pay more attention with: Last_Error will be blank, and Slave_IO_State will report “Waiting for master to send event“, also the Seconds_Behind_Master will indicate how far behind it is. If you see those then congratulation you have configured MySQL slave replication.

You can now exit MySQL shell:

quit;

Finishing Up

Leave Slave server for a while and go back to Master server. Login back to MySQL shell at Master server:

mysql -u root -p

this is important, as you locked the tables of MySQL database in Master server, you can now safely unlock it:

UNLOCK TABLES;
quit;

pic:

2015-06-15_221916

In production environment this is very important to make sure database between Master and Slave can be synced easily, but visitors / users of your websites will not able to make changes (post comment, add article, etc) during your time setting up MySQL replication above. But however you’ll not suffer any downtime during the process. That’s it.

Additional Note:

Once Master – Slave mode is enabled and succeed, the MySQL root password of Slave server will change following its Master.

If you accidentally change a row of data on your slave or if there is an issue in connecting, try issuing this command inside MySQL shell:

STOP SLAVE;
SET GLOBAL SQL_SLAVE_SKIP_COUNTER = 1;
START SLAVE;

Do not forget to follow me on twitter to get notified quicker when a new article is posted. Have fun!


This post Master – Slave MySQL Replication Tutorial for Newbie is part of ServerMom.

$24/yr 1GB RAM VDR @ ImpactVPS

$
0
0

impactvps

Special promo from ImpactVPS offering their 1GB RAM VDR (Virtual Dedicated Resources) for only $24 per year using special coupon code. VDR is quite new stuff in VPS arena. It is a feature offering resource bundle instead of a VPS. It means you can create multiple VPS from a single VDR. Shortly saying, unlike a standard VPS package, you can split the resources you pay for into as many servers of any size you want.

However I don’t quite sure how can you split effectively their 1GB VDR which comes only with 1 ipv4. Anyway, here’s the detail:

VDR1 (order link)

  • 2 Cores
  • 1GB RAM
  • 10GB SSD Disk
  • 1000GB Bandwidth
  • 1 IPv4
  • IPv6

There are also VDR 4 (4GB RAM) up to VDR 20 (20GB RAM) available from their website.

Coupon Codes available:

  • use LEB to receive 41% OFF on monthly plan
  • use LAUNCH to receive 40% OFF on monthly plan.

Hardware used in each node: Dual E5v3 Intel Processors with 128GB of DDR4 Memory, 4 x 1TB SSDs and a 10Gbps fiber connection to the node.

Virtualization: OpenVZ

Location: Incero DC – Seattle
Test IPv4: 107.155.106.130
Test IPv6: 2604:0880:000a:0002:0000:0000:0000:0001
Payment Options: PayPal, Credit Card (Not through paypal) and Bitcoin.

Ever used their service before? Go ahead tell us what you think.

This post $24/yr 1GB RAM VDR @ ImpactVPS is part of ServerMom.

$13.5/yr 128MB RAM VPS @ RamNode

$
0
0

ramnode

RamNode is once again announcing promo code allows anyone to get discounted price on any of RamNode’s VPS plan. The promo code for 2015 is ANY10 which allows you to get 10% off annually (recurring). Using that coupon code you can get thier 128MB CVZ plan for only $13.50/year with following specs:

Looking for big discounted price to buy a VPS from RamNode? Here it is valid coupon code for April 2014 allows you to get 42% OFF lifetime / recurring. The coupon is TWOYEAR which is only valid for new product orders / upgrades which means you can’t use it for renewal. Can old RamNode’s customers use it? Obviously, as long as you/they are one of RamNode’s happy customers. The 42% off lifetime promo is valid for limited time only. The TWOYEAR coupon is released to celebrate their 2nd anniversary as well as for the opening of their New York location.

For your information, RamNode is one of my favorite VPS providers. They have solid nodes, fast disk I/O, fast network speed, great uptime and solid customer support. Their node servers are located at 4 (four) locations: New York City – US, Atlanta – US, Seattle – US and Netherlands. Each VPS comes with the following features:

  • SolusVM control panel
  • 1Gbps fair share port speed
  • Automated backups
  • Free DNS hosting
  • INSTANT setup
  • Optional DDoS protection for ALL locations

In case if above coupon code won’t work, you can also use RN25OFF to get 25% Off lifetime and SB31 to get 31% OFF lifetime discount.

Network Information

Telehouse Chelsea – New York City, New York
Looking glass: http://lg.nyc.ramnode.com/

55 Marietta – Atlanta, Georgia
Looking glass: http://lg.atl.ramnode.com/

The Westin – Seattle, Washington
Looking glass: http://lg.sea.ramnode.com/

Equinix – Los Angeles, California
Looking glass: http://lg.la.ramnode.com/

Dataplace – Alblasserdam, The Netherlands
Looking glass: http://lg.nl.ramnode.com/

Do you one of RamNode’s happy customers? Yes I am.

This post $13.5/yr 128MB RAM VPS @ RamNode is part of ServerMom.


$8.5/yr KVM VPS 64MB RAM @ Maximum VPS

$
0
0

maximum-vps-net

MaximumVPS.net (Maximum Virtual Private Servers LLC) is running a special promo event offering wide range KVM VPS plans starting from $8.5/year. The VPS brand is relatively new as they started their business since February, 2013.

Current Node specifications

  • Dual Intel Xeon® L5420 processor
  • 16GB+ ECC RAM
  • 4 x 1TB Western Digital RE Drives
  • Adaptec 3405 Hardware RAID with Battery Backup

Locations

Special Promo Plans

64MB RAM Special

  • RAM: 64MB
  • IPs: 1 IPv4, IPv6 on request
  • HDD: 5GB RAID 10 Protected Storage
  • CPU: 1 Shared Xeon® Core
  • Bandwidth: 56GB at 1Gbps
  • Virtualization: KVM
  • Locations: Jacksonville, FL and Los Angeles, CA
  • Only $8.5/year or 1.37$/month
  • Order: Jacksonville, FL or Los Angeles, CA

128MB RAM Special

  • RAM: 128MB
  • IPs: 1 IPv4, IPv6 on request
  • HDD: 5GB RAID 10 Protected Storage
  • CPU: 1 Shared Xeon® Core
  • Bandwidth: 128GB at 1Gbps
  • Virtualization: KVM
  • Locations: Jacksonville, FL and Los Angeles, CA
  • $6.25 Semi-Annually / $12.50 Annually
  • Order: Jacksonville, FL or Los Angeles, CA

256MB RAM Special

  • RAM: 256MB
  • IPs: 1 IPv4,16 IPv6
  • HDD: 10GB RAID 10 Protected Storage
  • CPU: 1 Shared Xeon® Core
  • Bandwidth: 256GB at 1Gbps
  • Virtualization: KVM
  • Locations: Jacksonville, FL and Los Angeles, CA
  • $8.25 Semi-Annually / $16.50 Annually
  • Order: Jacksonville, FL or Los Angeles, CA

What makes me interested is the fact there are not many providers offer small KVM plan. So here it is your chance to grab a very low end dedicated virtual box.

This post $8.5/yr KVM VPS 64MB RAM @ Maximum VPS is part of ServerMom.

Setup FQDN Hostname on CentOS Server

$
0
0

Today’s another basic tutorial for newbies is setting up or change default hostname to Fully Qualified Domain Name (FQDN) format on CentOS 5, 6, and 7 / RHEL 5, 6 and 7 server. I believe somehow you may need to do this task because not all providers are provisioning your servers with hostname in FQDN format as default.

Take Atlantic.net as example, when you are creating a server, they will only ask you to enter a Server Name which is a descriptive name about your server you wish to create. As a result, if I entered “dailyblog” as my Server Name, then default hostname will be also “dailyblog”. So if by any chance you are in the same situation and want to change current hostname to another one? Simply follow these steps below.

What’s FQDN? A fully qualified domain name (FQDN), sometimes also referred to as an absolute domain name, is a domain name that specifies its exact location in the tree hierarchy of the Domain Name System (DNS) – Wikipedia.

Procedure on CentOS 7 / RHEL 7

Step 1 – Login to your server / VPS as root or as a user with root privilege.

Step 2 – Check current hostname:

hostname

It will returns output like this:

2015-06-22_215619

Step 3 – You may also want to find out status of your server and its hostname using hostnamectl command:

hostnamectl status

output:

2015-06-22_215810

Step 4 – Now here’s the magic command to change default CentOS 7 hostname without having to reboot your server:

hostnamectl set-hostname fqdn.host.name

Change fqdn.host.name to your own FQDN hostname. Example:

hostnamectl set-hostname servedby.servermom.org

And the output is:

2015-06-22_220427

So if you issue the hostnamectl status command again, you’ll see it changed. But however you’ll only see it has really changed if you close current session and reopen new SSH session (get out and login back):

2015-06-22_220510

CentOS / RHEL 5, 6, and 7

This procedure can be done on many CentOS distribution.

Step 1 – Login to your server as root or as user with root privilege (sudo)

Step 2 – Check current hostname:

hostname

example:

2015-06-22_215619

Step 3 – Edit network file located at /etc/sysconfig/ using your favorite text editor like vi or Nano. As always, I prefer to use Nano editor.

nano /etc/sysconfig/network

You’ll then see something like this:

2015-06-22_221913

Modify the HOSTNAME= value to match your FQDN host name. Example:

2015-06-22_222002

Now save changes and exit the editor which in Nano it is Control+O then Control+X.

Step 4 – Edit your server hosts file, again, use your favorite text editor:

nano /etc/hosts

Do not forget to set or change the host that is set to your IP address on server.

xxx.xxx.xxx.xxx  fqdn.host.name fqdn

Example again:

2015-06-22_222541

Step 5 – Done, now restart networking service and run the hostname command again:

/etc/init.d/network restart
hostname

Step 6 – Reboot your server to apply hostname changing, then now when you login back you’ll see it changed:

reboot

example:

2015-06-22_222931

That’s it for now. Enjoy..

This post Setup FQDN Hostname on CentOS Server is part of ServerMom.

[Quick Tip] How to Upgrade Your VPS From Debian 8.0 to 8.1 (Jessie)

$
0
0

Here I come again with very basic tutorial and this time I’ll show you how to upgrade your server running Debian 8.0 to Debian 8.1 along with a simple command how to check your Debian version.

About Debian 8.1

Debian 8.1 codename Jessie was released at June 6th, 2015. It is the first update of its stable distribution Debian 8. This update mainly adds corrections for security problems to the stable release, along with a few adjustments for serious problems. Security advisories were already published separately and are referenced where available. You can read full change log here.

How to Upgrade

Step 1 – Login to your server as root or as user with sudo privilege:

2015-06-25_092018

Step 2 – Check which version your Distro is. Use command below:

lsb_release -a

It will look like this

2015-06-25_092958

Step 3 – Finally, here’s the magic command to upgrade your Ubuntu server:

apt-get upgrade -y

2015-06-25_093052

Step 4 – That’s it. Now you can double-check it again to make sure it has been upgraded successfully.

2015-06-25_092943

Enjoy..

This post [Quick Tip] How to Upgrade Your VPS From Debian 8.0 to 8.1 (Jessie) is part of ServerMom.

ServerMom’s New Server Setup v2

$
0
0

It’s been more than a year since me last server setup which I used combination of LiteSpeed-powered shared hosting, 1 web server on Ramnode VPS, 1 MySQL server and 1 Varnish server (load balancing) – see my old server setup here. Recently I decided to change my old server setup with the new one. What’s my reason behind the change?

Firstly because my shared hosting account at Crocweb has expired and it is too pricy to extend. Secondly, I’ve been so lucky because that the founder of Atlantic.net contacted me with special offer allowing me to host my blog in their cloud infrastructure. Thirdly, I just want to try different server setup.

So here is my new server setup which I currently use to run Servermom.org:

  1. Atlantic.net 4GB Cloud VPS to host all web files and MySQL database.
  2. Atlantic.net 512MB RAM Cloud VPS to run Varnish Cache server.
  3. Ramnode 512MB RAM OVZ VPS to Backup all web files
  4. Ramnode 256MB RAM OVZ VPS as MySQL Slave

Server Specifications:

  1. 4GB RAM + 2 vCPU + 100GB SSD + 5TB bandwidth on KVM cloud (New York City)
  2. 512MB RAM + 1 vCPU + 20GB SSD + 2TB bandwidth on KVM Cloud (New York City)
  3. 512MB RAM + 2 Cores CPU + 50GB SSD + 2TB bandwidth on OpenVZ (Atlanta)
  4. 256MB RAM + 1 Core CPU + 25Gb SSD + 1TB bandwidth om OpenVZ (Atlanta)

Technology used:

  1. CentOS 6.6 64-bit running full Vesta CP stack (LAMP plus Nginx frontend proxy minus DNS server / named)
  2. CentOS 6.6 32-bit running Varnish Cache server v3.0.7 (release date 23 March, 2015)
  3. CentOS 6.6 32-bit running Apache and PHP5. File syncing with rSync.
  4. CentOS 6.6 32-bit running MySQL server

Short of explanation:

Initially I just want to use single server which is the 4GB RAM cloud VPS from Atlantic.net but then I got downtime about 3 minutes. That was expected down time though. Atlantic.net contacted days before it happens and it’s not caused by the server itself but their upstream service providers were performing maintenance on their circuits.

While every effort will be made to minimize any interruption in service, customers may experience a 2-5 minute network service interruption during BGP re-convergence

So I decided to replicate my server to RamNode when in case the downtime is more than expected I can still minimize the downtime by switching my A record to RamNode. So then came the downtime which was not more than 3 minutes.

Few days after that (it’s yesterday exactly), NixStats told me that CPU load on my main server (the one with 4GB RAM and 2 vCPU) is rising high.

cpu-usage-alert

Here’s the statistic of that time:

cpu-usage

load-average

ram-usage

2015-06-25_124517

As what we can see above, while the CPU usage is going high (because httpd process) and so the Network I/O. The weird thing is the number of real visitors were not increasing. So I believed it was someone being so jobless to play around with my server. I didn’t have time to check whether it’s a DOS, DDOS, SYN Floods, or HTTP Floods attack. What I did remember that is in such situation (light attack) Varnish will come in handy. So I installed Varnish and put it running in very front of my Vesta CP server.

Shortly my server configuration as below:

Visitors -> Cloudflare (DNS) -> Varnish -> Nginx -> Apache + PHP + MySQL.

The result, CPU Load on my Vesta CP server is now normal (from 5.0 4.8 4.5 to 0.8 1.0 0.9)

You can view all my servers’ performance at:
http://uptime.servermom.org/

Conclusion: I think Varnish is really effective to reduce high CPU load. This time I simply use it as frontend caching not load balancing.

Some interesting articles being my consideration in using Varnish:

  1. The penultimate guide to stopping a DDoS attack (Unixy blog)
  2. How to block rate-limited traffic with Varnish (Dan Singerman blog)
  3. Withstanding DDOS attacks with Varnish (Varnish blog)
  4. Good steps to survive from denial-of-service / DOS attack (Stack Exchange)
  5. Me and Varnish against DOS attack (homeofficekernel @ blogspot)

How to setup all of those? I already wrote all the tutorial needed:

  1. How to install Vesta CP on CentOS
  2. How to setup MySQL Master-Slave Replication
  3. How to setup rSync and configuration
  4. How to Install Varnish Cache server

Any comment? Do not hesitate to drop comment regarding my current server setup. Or if you found any glitch, bug or problem while accessing this blog, I really appreciate if you can tell me. Thanks.

This post ServerMom’s New Server Setup v2 is part of ServerMom.

Install MySecureShell on Ubuntu, CentOS, Debian and Fedora VPS

$
0
0

Follow steps below to build a working secure FTP server using MySecureShell on Ubuntu, CentOS, Debian and Fedora VPS. Before we step forward, it is better to firstly read some basic information about what MySecureShell is.

Based on OpenSSH, MySecureShell is a really lightweight very secure FTP server you can install in major Linux distribution. MySecureShell is shortly a great alternative to vsvtpd because it is more secure, multi-platform and it is free (Open Source license).

mysecureshell-install

Some Key Features

  • Bandwidth control function;
  • Security rights information ;
  • Only authorized files and folders can be shown ;
  • Easy installation and administration of the server with a graphical interface ;
  • Management of activity of the server with logs ;
  • Restrictions of users by ip, groups ;
  • Power Encryption ;
  • No certificate problems non-certified or certificate generation ;
  • Support public and private keys for secure authentication without password ;
  • Only one port to open for SSH and SFTP (port 22 by default) ;
  • The protocol used is much more optimized than FTP because it is based on the protocol of the NFS ;
  • Free and open source ;
  • Advanced logging information ;
  • ACL can be made with IP/Usernam/Groups/VirtualHost/… ;
  • Confined environments (chroot, which is also available in the latest version of OpenSSH) ;
  • Restrict users to have sftp only (shell access is disabled by default) ;

How to Install

The easiest way to install MySecureShell server on your vps is done via repository which luckily can be added in few seconds. Here’s the steps for each Linux distribution:

Step 0 – Login to your server as root or as user with sudo privilege then switch to root by using su command.

On Debian Server

Step 1 – If your server is running on Debian 8, simply issue command below:

apt-get install mysecureshell -y

That’s it. Luckily MySecureShell is included already in Debian 8 repository.

Step 2 – But however if you chose to use Debian 7 or lower, then you have to follow more steps below:

Edit source.list file with your favorite editor program like Nano

nano /etc/apt/sources.list

Step 3 – Now put this text overthere

deb http://mysecureshell.free.fr/repository/index.php/debian testing main
deb-src http://mysecureshell.free.fr/repository/index.php/debian testing main

Do not forget to save changes and exit the editor (In Nao it is Control+O then Control+X)

Step 4 – Import GPG Key with this one liner:

gpg --keyserver hkp://pool.sks-keyservers.net --recv-keys E328F22B; gpg --export E328F22B | apt-key add -

Step 5 – Finally update your server so the newly added repositoryy can be applied.

apt-get update -y

Step 6 – Finally. Here’s the magic command to install it:

apt-get install mysecureshell -y

On Ubuntu Server

Step 1 – If your server is running on Ubuntu 15.04, simply issue command below:

apt-get install mysecureshell -y

That’s it. Luckily MySecureShell is included already in Ubuntu 15.04 repository.

Step 2 – But however if you chose to use Ubuntu 14.04 or lower, then you have to follow more steps below:

Edit source.list file with your favorite editor program like Nano

nano /etc/apt/sources.list

Step 3 – Now put this text overthere

deb http://mysecureshell.free.fr/repository/index.php/ubuntu testing main
deb-src http://mysecureshell.free.fr/repository/index.php/ubuntu testing main

Do not forget to save changes and exit the editor (In Nao it is Control+O then Control+X)

Step 4 – Import GPG Key with this one liner:

gpg --keyserver hkp://pool.sks-keyservers.net --recv-keys E328F22B; gpg --export E328F22B | apt-key add -

Step 5 – Finally update your server so the newly added repository can be applied.

apt-get update -y

Step 6 – Finally. Here’s the magic command to install it:

apt-get install mysecureshell -y

On CentOS Server / RHEL

Step 1 – You have to firstly alter /etc/yum.conf file. So edit it using your favorite text editor like Nano:

nano /etc/yum.conf

Step 2 – In Nano, scroll down the page and put these lines in the end part:

[mysecureshell]
name=MySecureShell
baseurl=http://mysecureshell.free.fr/repository/index.php/centos/$basearch/
enabled=1
gpgcheck=0

Do not forget to save changes and exit the editor (In Nao it is Control+O then Control+X)

Step 3 – Finally update your server so the newly added repository can be applied.

yum update -y

Step 4 – Then now use command below to start the installation:

yum install mysecureshell -y

On CentOS Server / RHEL

Step 1 – You have to firstly alter /etc/yum.conf file. So edit it using your favorite text editor like Nano:

nano /etc/yum.conf

Step 2 – In Nano, scroll down the page and put these lines in the end part:

[mysecureshell]
name=MySecureShell
baseurl=http://mysecureshell.free.fr/repository/index.php/fedora/$basearch/
enabled=1
gpgcheck=0

Do not forget to save changes and exit the editor (In Nao it is Control+O then Control+X)

Step 3 – Finally update your server so the newly added repository can be applied.

yum update -y

Step 4 – Then now use command below to start the installation:

yum install mysecureshell -y

That’s it. MySecureShell is now ready-to-use. Thanks for reading my first article here at Servermom.

This post Install MySecureShell on Ubuntu, CentOS, Debian and Fedora VPS is part of ServerMom.

Viewing all 159 articles
Browse latest View live