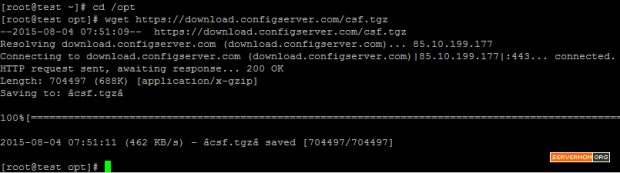
I’ve heard about InMotion Hosting a lot before, but then I finally get a chance to give it a try. Being one of well-known hosting provider, InMotion Hosting (or may I say IMH) is offering a wide-range services from Shared Hosting to Dedicated Server and something in between (Domain, Web Design, Managed Support, etc). Because I mostly talk and review about VPS so here I am to update you with a short and straightforward review if InMotion VPS Hosting.
About IMH
![]()
Visit: InMotion Hosting website.
IMH is an award winning hosting provider headquartered in Los Angeles, CA. They seems operating their own datacenter utilizing server grade equipment and has been adopting Go Green technology. If you ask Google some review about IMH, then you’ll see so many reviews already. With such good reputation, IMH has gained trust from their loyal customers.
Currently they operate services in two Datacenter locations: Los Angeles, CA and Washington, D.C. Each location makes use of following datacenter specs:
- Servers housed in Category A, PCI compliant data centers. These include several controlled access points.
- N+2 or N+1 power systems with multiple battery and diesel power sources in case of public utility failure.
- BGP4 network to prevent downtime in case of loss of hardware.
- N+1 Configurations on all servers using RAID 5.
- 24x7x365 System Administrators on hand.
- Backups created every 36 hours up to 10GB.
- Max Speed Zone options (available to VPS and Business Class hosting clients only).
VPS Hosting Plans
Currently they only have 3 (three) VPS plans. Each with following specs:
VPS-1000S
- RAM: 4GB (burstable RAM available during times of high traffic)
- Storage 60GB
- Bandwidth 2TB
- IPv4: 2
- Price: $30/month
VPS -2000S
- RAM: 6GB (burstable RAM available during times of high traffic)
- Storage 130GB
- Bandwidth 3TB
- IPv4: 2
- Price: $45/month
VPS-3000S
- RAM: 8GB (burstable RAM available during times of high traffic)
- Storage 200GB
- Bandwidth 4TB
- IPv4: 3
- Price: $75/month
All VPS plans come with: fast SSD drive in RAID 6 configuration, free WHM/cPanel license (if paid yearly), custom-made Firewall, free automated backup (up to 10GB) and free server management (managed vps).
Initial Review
I’m just curious of what’s behind their popular name? I couldn’t answer that when I first time went to their site registering and logging in. As what you may see that their official website looks like a little bit outdated. Uh come on, see DigitalOcean, Atlantic.net, or Linode, most of big players have their websites updated to modern design trend. Well there’s nothing wrong with that, especially if they are focusing on quality of services offered.
What then impressed me is custom hosting management panel they developed. Instead of using WHMCS, IMH developed and is using a custom user panel namely Account Management Panel (AMP). Users can manage every aspect of a hosting service purchased there. From AMP a user can: reset password, register/transfer domain, update contact info, pay bill, launch cPanel (auto login), reset cPanel password, launch WHM (auto login), restart VPS, CSR request, and a menu to open Account Technical Details.
![2015-09-02_212631]()
Account Technical Details page is a section where all information about your hosting service (which in this case is VPS) from Plan name, Domain, cPanel username, server, IP address, etc.
![2015-09-02_213014]()
Something missing? Yup, that time I couldn’t find what’s the default / initial root password, what port SSH is accessible at, basic VPS statistic like how much RAM is used, how much disk space is left, how high the CPU load and how much bandwidth has been used. Please IMH staff, if you read this and you thing I’ve missed something then please feel free to correct me.
How Can I Access My VPS from SSH?
That was my first question after my account had been activated. I couldn’t find the information from the very first time. I had to firstly browse to their Support Center section and yes I got it. All users of their VPS plans are allowed to have access to their server via SSH but with several conditions:
- SSH root access is not given directly. User has to request root access (the process is very easy and straight forward)
- They cannot support any changes users have made to the server or software after obtaining root access.
- Any time required by system administrator team to repair, troubleshoot or restore services due to changes made (as a result of having root access) may be billed at a rate of up to $75/hour.
- They can not guarantee compatibility or performance of third party software
- In order for root access to be relinquished, a server move or format may be necessary for security reasons. A system administration fee of up to $75/hour may apply for these situation.
- Users must understand those situations.
And once the root password is given, a user is still not able to access the vps directly. User have to go to AMP, open WHM, go to Firewall page and add his/her IP to white list.
![2015-09-02_213610]()
Server Performance
Ok, who cares about their website design and UI right? So let’s go to the performance of their server. As usual, I did some quick test tasks to find out how the server performs.
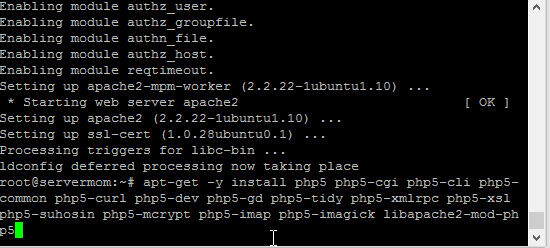
FreeVPS.us Test Script
![2015-09-03_211349]()
Wow, wow and wow! From that test I can see that my VPS performance is really slick. It is not good but it is great! Especially the Download Speed result. But there are two things I note: First, the number of cores and secondly is its amount of RAM. In their official page you can see that the VPS-1000s is advertised to have 4GB RAM but didn’t mention that about 2,5 GB of that advertised RAM is SWAP. But hey take a look at the number of cores! Not many VPS providers giving you access to those number of cores.
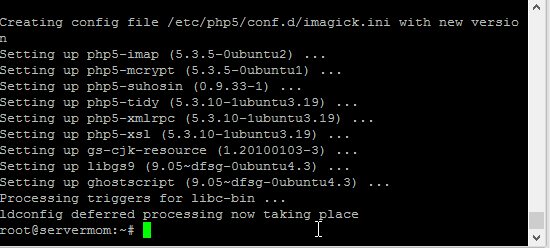
vHWINFO Test
![2015-09-03_211425]()
Similar result but this time it show outstanding I/O speed.
DD Test
![2015-09-03_211550]()
Not sure about I/O test result from two previous tests, I did a single DD test and the result is still amazing.
Network Speed Test
![2015-09-03_212019]()
Here’s the graphical result:
![4633731388]()
Pretty awesome huh?
Pros and Cons of InMotion VPS Hosting
Pros:
- Server is responsive, fast and powerful
- Bandwidth is fast
- Generous CPU cores
- Complete documentation to help any user with any question
- Free WHM/cPanel included
- It is a Managed VPS service, each plan comes with free server management service.
- Custom-developed firewall
- Free website migration
- Hosted at Green DC
- They own all equipment, hardware and DC
- 90-day money-back guarantee
- 24/7/365 U.S. based support
- Free daily backups
- ModSecurity installed by default
- Very perfect for newbies or for developers who want to focusing on websites and not hassling with hosting
Cons:
- It is not a lowend segment (price is competitive but you get what you pay for, it is worth it)
- SSH root access is not given directly, yet users have to firstly whitelist their IP via WHM
- No feature / option to rebuild the VPS or to reinstall with another OS
- No direct viewable statistic of server’s resource usage (RAM, Disk, bandwidth, etc)
- Amount of RAM advertised is true RAM + SWAP.
- Login to Support Center needs separate account (not integrated with AMP)
- No IPv6 at the moment.
- Lack information about server specs.
Conclusion
I believe all of cons I wrote will never beat down the pros. Shortly saying, the services offered by IMH are seriously awesome. Each server crafted by hand and detail, It is powered with enough horse power to run your websites. The services they offer are really suitable for newbies to web developers. So if you are looking for VPS that’s ready to use and you don’t really want to get your hand dirty setting up LAMP, then I can ensure you that IMH is the perfect choice. IMH is the best managed VPS hosting provider.
Closest competitor of IMH is KnownHost, but IMH offers more power, more SSD space, and more RAM for cheaper price. So if you ask me: Inmotion Hosting vs KnownHost? My answer will absolutely IMH.
Some more information about their VPS:
- Available Data Center locations: Los Angeles and Washington DC
- They have their own IPs assigned: AS54641
- Virtualization: Virtuozzo
- Node specs: Intel Xeon CPU E5-2670 v3
- VPS control panel: No Virtuozzo Power Panel
- Complete Benchmark Report on Server Bear.
Seen enough? Go check it out yourself: http://www.inmotionhosting.com/vps-hosting
Disclaimer: The test server is provided for free but my review will always be objective.
This post InMotion Hosting VPS – A Short Review is part of ServerMom.